Do you want to automatically deploy WordPress theme changes to your website?
Most professional web developers use a version control system like GitHub or Bitbucket and automatically deploy their changes to staging or live sites. You can use a deployment system such as DeployHQ to act as an intermediary between your Git repository and your server.
In this article, we will show you how to automatically deploy WordPress theme changes using GitHub and Deploy.

Why Use a Version Control System for WordPress Theme Development?
A version control system allows you to record changes to a file or set of files over time so that you can recall specific versions later. In other words, every time we change a WordPress theme template, image, or CSS file, a version control system keeps track of these changes.
For instance, let’s say you decide to run a batch of changes. If those changes cause an issue, then you can revert (or roll back) to an existing ‘version’ of our WordPress Theme.
Git is a common version control system, and allows multiple users to work on the same code base, such as a WordPress Theme. If two developers edit the same file, Git has built-in controls to deal with these issues (known as merge conflicts).
For more information, check out our beginner’s guide to using Git with WordPress.
Why Use a Deployment System?
A deployment system that integrates with services such as GitHub allows you to automatically or manually upload changes you have made to your WordPress theme.
You can see it as a one-way synchronization system. For example, if you delete a file from your WordPress theme, you’d also have to delete it via FTP as well. With a deployment system, this is automatically done for you when you commit your code changes to GitHub.
In this article, we’ll be working with a deployment system called DeployHQ, or simply Deploy. Deploy works with other Git repository providers like Bitbucket, but we’re going to stick with GitHub for this tutorial.
Setting Up a GitHub Repository for Your WordPress Theme
First, you’ll need to set up an account on GitHub and then use the GitHub client for Windows or Mac to store changes to your WordPress Theme.
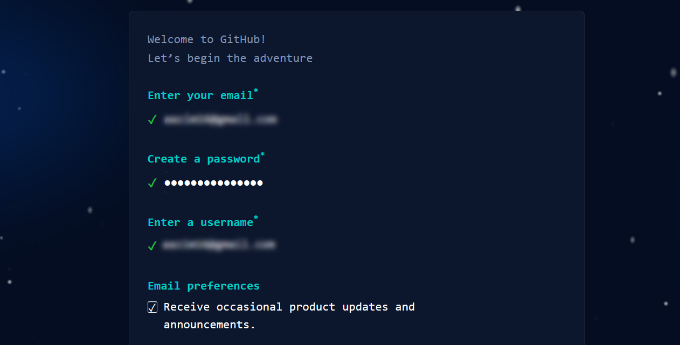
To start, you can visit the GitHub website and enter your email address to create a new account.


Next, you’ll need to enter a username and password.
GitHub will also ask you to choose email preferences.

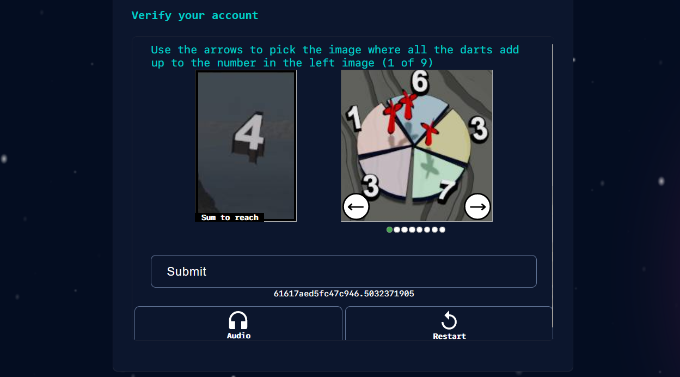
After that, you can scroll down and verify your account by solving a puzzle.
It’s just like reCAPTCHA on your WordPress site.

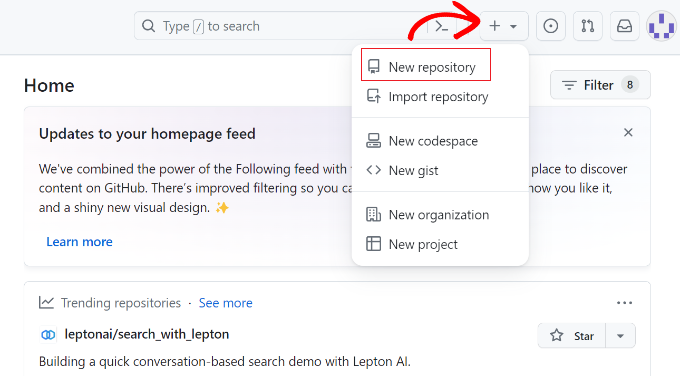
Once your account is verified, you will see the GitHub dashboard.
From here, you can click the ‘+’ icon at the top and select the ‘New repository’ option.

Next, you can start by setting the repository name, like your WordPress theme’s folder name.
Then, you’ll need to choose whether this is a Public or Private repository. Public repositories allow everyone to see your code but cannot make changes to it. Private repositories are available only for you to see.
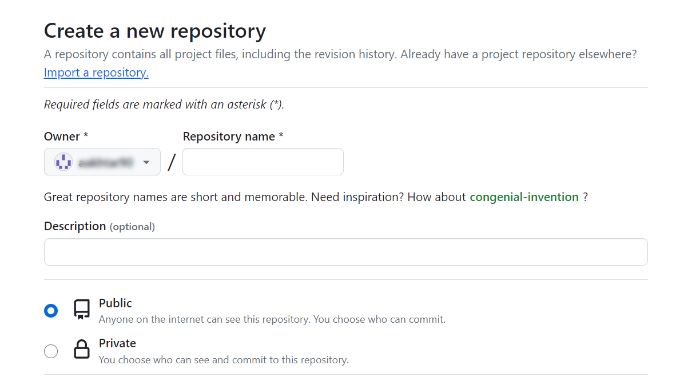

Finally, you can tick the checkbox if you want to add a README file.
Once that’s done, simply click the ‘Create repository’ button.
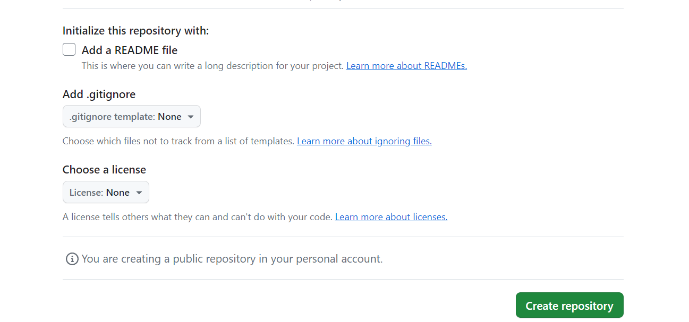

Your GitHub repository will now be ready for use.
Install GitHub for Windows or Mac
Next, you need to put our WordPress Theme’s code into our repository. A simple way of doing this is by using the GitHub client, which installs on your computer.
Simply visit the GitHub Desktop website and download the Desktop client available for Windows or Mac.
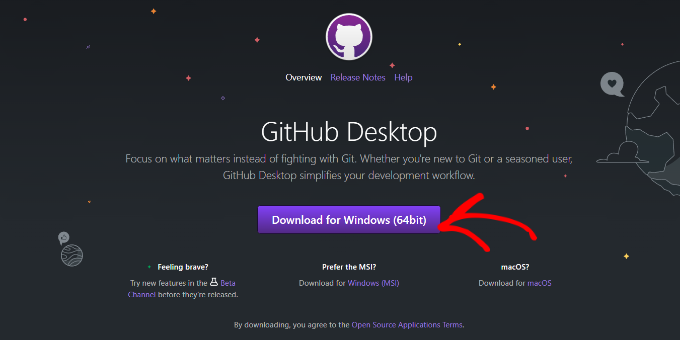

Once the download is complete, launch the GitHub client.
Next, you’ll need to sign in using your GitHub account. You can click the ‘Sign in to GitHub.com’ button.


This will launch GitHub on your web browser.
Simply click the ‘Authorize desktop’ button to allow GitHub Desktop to access your account.


After that, you can open the GitHub Desktop client.
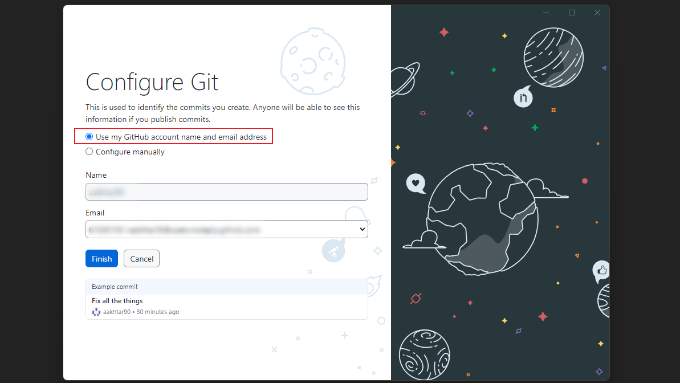
Next, you will need to configure Git. Simply select the ‘Use my GitHub account name and email address’ option and click the ‘Finish’ button.

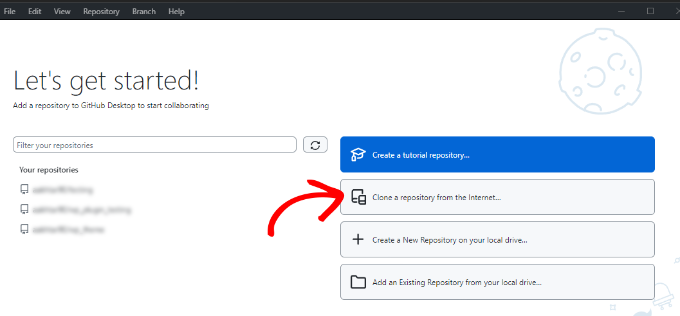
Next, let’s add the GitHub repository that you created earlier.
To do this, click the ‘Clone a repository from the internet’ option.

You will see a list of your GitHub repositories, including the one you created earlier.
Simply select the repository and choose where you want to store it on your computer under the ‘Local Path’ field. Once that’s done, you can click the ‘Clone’ button.
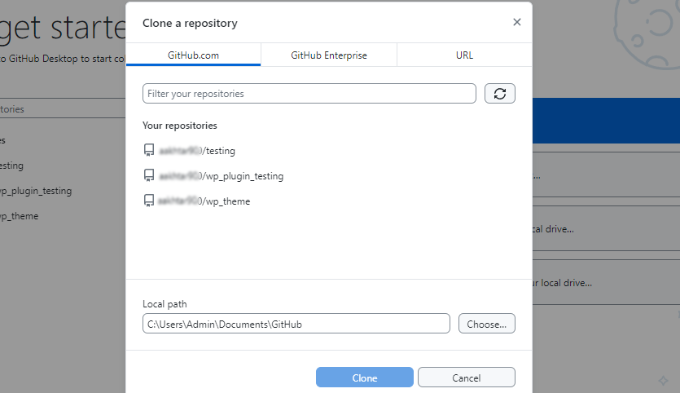

You’ve now cloned (copied) your repository hosted on GitHub to our computer.
Next, you need to add our WordPress theme code to the repository’s folder and then commit and sync this code to GitHub.
You can start by finding the folder you selected in the above step on your computer. It should have a README.md file in the folder. Depending on your computer’s settings, you may also see the hidden .git folder.
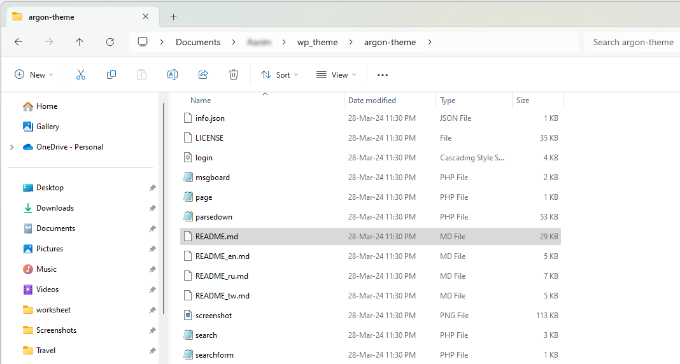

When you’ve made changes to your WordPress theme’s code, simply copy and paste them into this folder.
After that, you can open the GitHub Mac or Windows app and see the files you’ve just added appear in the window:
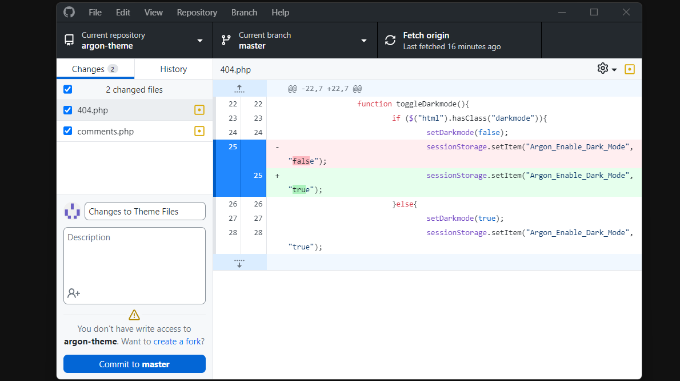

You will see the changes highlighted in green. These are the changes that you have saved in the local repository, but you haven’t yet committed those changes.
Next, you will need to commit (upload) these files to GitHub. To do this, simply enter some text into the Summary box to explain the changes we’ve made and click the ‘Commit to master’ button.
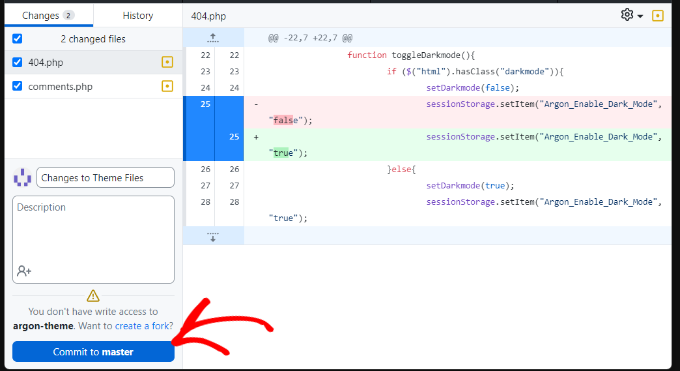

This commits the changes you’ve made to the repository.
To upload those changes to GitHub, you can click the ‘Push origin’ button.
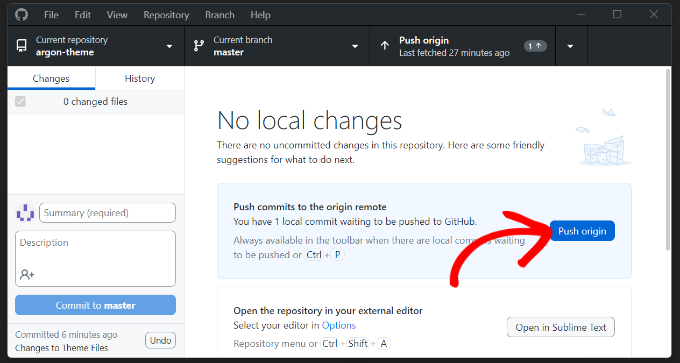

To check your commit has been uploaded to GitHub, visit your repository on the GitHub website. If everything works, you’ll see your code changes.
Setting Up Deploy
The final step is to make sure that any changes on your GitHub repository are pushed to your WordPress website.
DeployHQ, or Deploy, is a web-based service that will monitor changes to your GitHub repository, and automatically or manually upload just those changes to your WordPress website.
Imagine it as a connection between your code and the web server.
First, you need to visit the Deploy website and sign up for a new account. Deploy is a paid service, but it offers a free account for one project and 5 deployments per day.


After finishing signing up, you can log in to your Deploy dashboard.
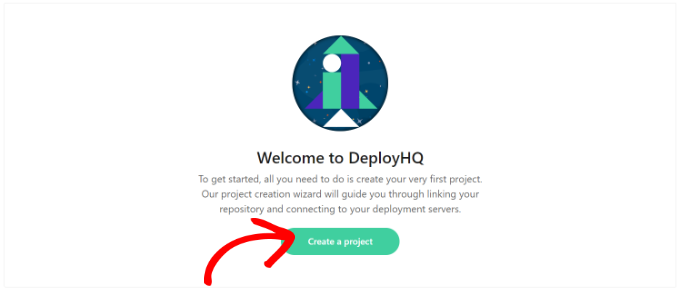
From here, you can click the ‘Create a project’ button to get started.

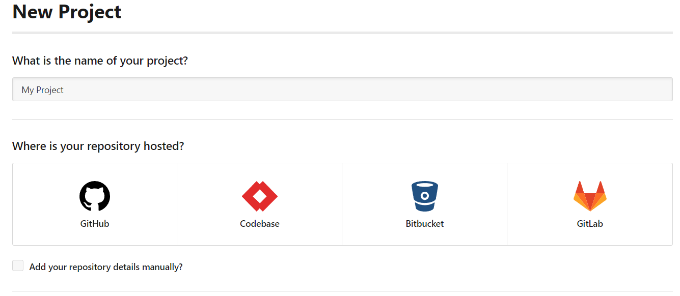
Next, you need to provide a name for your project.
After that, you can select GitHub as your code hosting platform.

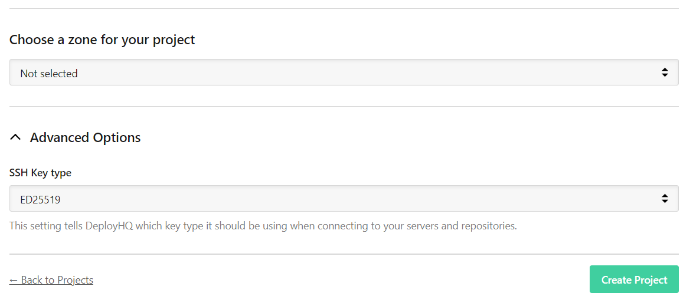
If you scroll down, you’ll find more options like choosing a zone for your project and advanced options.
Once that’s done, click the ‘Create Project’ button to continue.

Deploy will now redirect you to GitHub.
If you are not already signed in, then you will be asked to login. After that, you will be asked to allow Deploy to access your GitHub account.
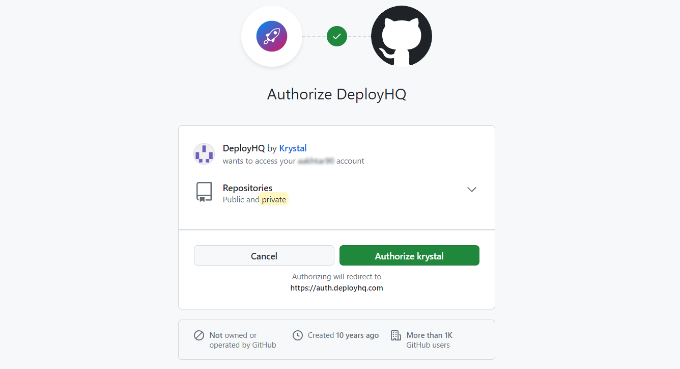

Simply click the ‘Authorize krystal’ button to continue.
Deploy will fetch the list of your repositories from GitHub and will ask you to select a repository for this project.
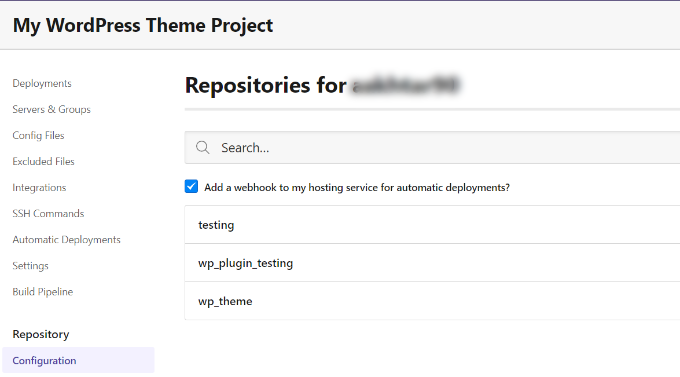

Simply click on your WordPress theme repository, and Deploy will import it for you.
In the next step, Deploy will ask you to provide server information. This is where you tell Deploy how to upload files to your WordPress server.
You can start by entering a name and selecting ‘FTP‘ as the protocol option.
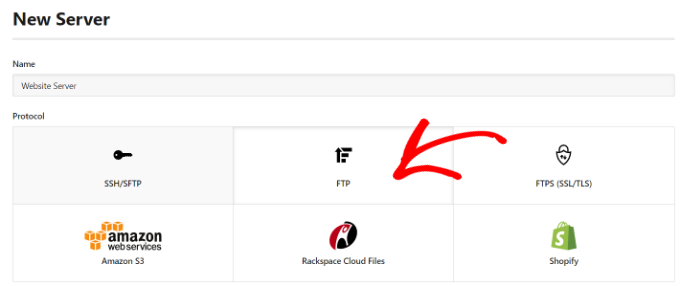

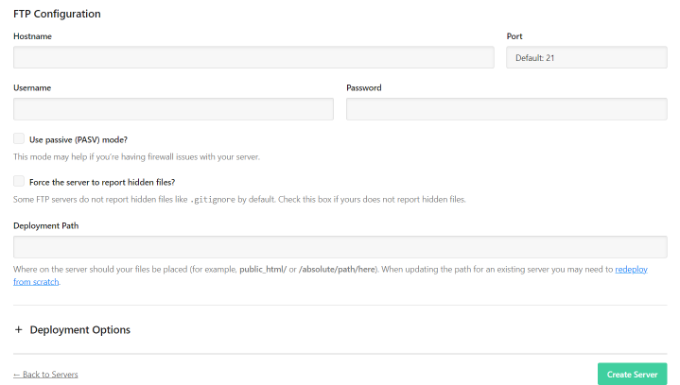
Next, you will need to scroll down and enter your FTP credentials.
Hostname: Your website’s SFTP/FTP host
Port: Your website host’s SFTP/FTP port (typically SFTP = 22, FTP = 21)
Username and Password: FTP username and password
Deployment Path: The path you’d navigate to before uploading your WordPress theme files. For example, public_html/example.com/wp-content/themes/MyTheme, where MyTheme is the WordPress theme you have committed to GitHub.
After entering these details, click the ‘save ‘Create Server’ button.

Deploy will now test your server connection and if everything works correctly, then it will show you a success message.
You can now click on the ‘Deploy’ button to upload your GitHub files to your website.
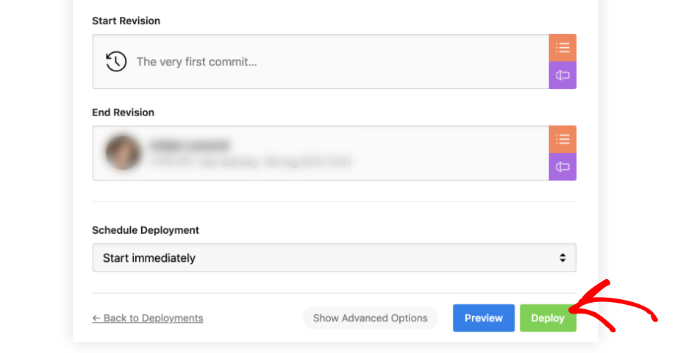

You will now see the progress of deployment.
Once Deploy has finished, you will see a success message.
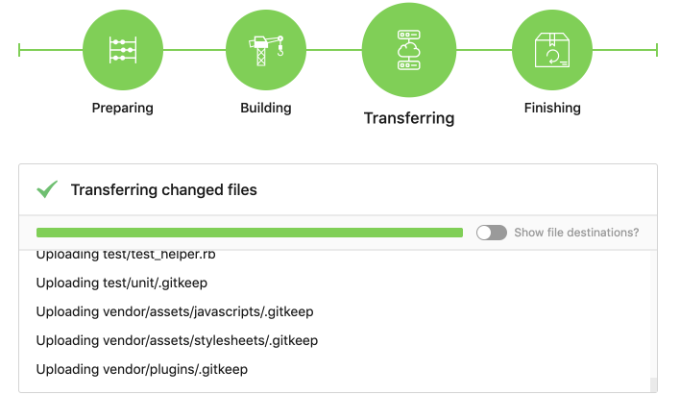

You have successfully deployed changes from GitHub to your website using Deploy. Now, when you make changes to your WordPress theme on your computer, you need to commit them to GitHub. After that, you need to visit the Deploy website to start the deployment manually.
Let’s see how to set up automatic deployment so that any changes you commit to GitHub are automatically deployed to your website.
Setting Up Automatic Deployment
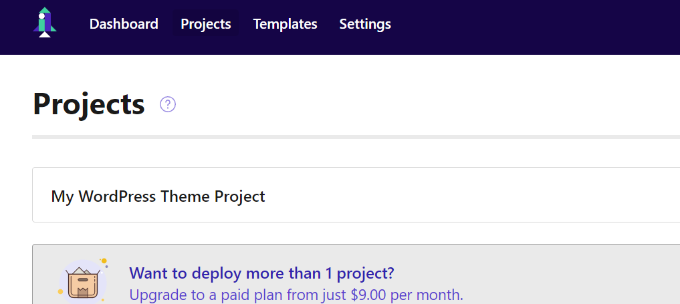
First, you need to visit your Deploy dashboard and go to the ‘Projects’ page. From here, simply click on the name of your project.

Next, you can head to the ‘Automatic Deployments’ tab from the menu on the left.
Here, you will need to enable the option next to your server for auto-deployments.
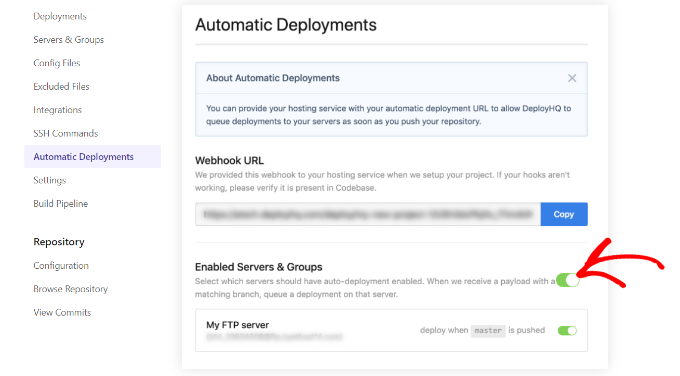

After that, you’ll have to copy the Webhook URL and add it to your GitHub account.
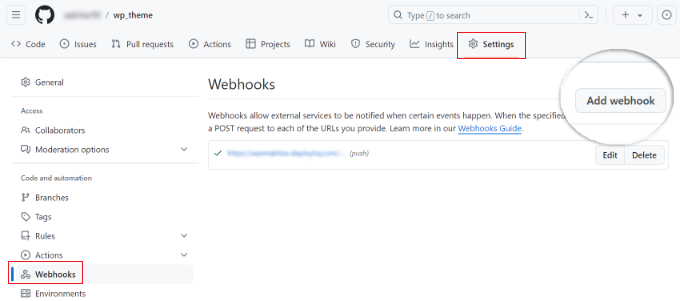
Simply log into your GitHub account in a new browser tab. Then click on your repository and head to the Settings tab. From here, you can go to the Webhooks section from the menu on the left and click the ‘Add webhook’ button.

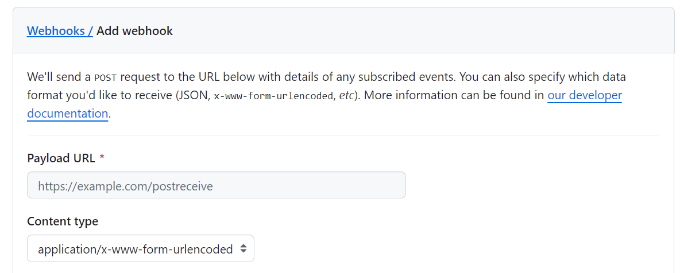
Now paste the webhook URL you copied from the Deploy server settings page in the Payload URL field.
After that, select application/x-www-form-urlencoded as the Content type from the dropdown:

Next, you can scroll down and select which events should trigger the webhook. You can use the default setting.
Once that’s done, simply click the ‘Add webhook’ button.


That’s all. Your GitHub repository will now notify Deploy when there are new changes to your repository. Deploy will then automatically implement those changes to your website.
We hope this article helped you learn how to automatically deploy WordPress theme changes Using GitHub and Deploy. You may also want to see our guide on how to create a staging environment for a WordPress site and must-have WordPress plugins for business sites.
If you liked this article, then please subscribe to our YouTube Channel for WordPress video tutorials. You can also find us on Twitter and Facebook.

